

Now I have to say at this point I hate how this plant is looking so far but figured I'd post it so you can all learn from my mistakes as well as learning any useful tips.
* * * * * * * *
Well I kinda jumped ahead of myself yesterday. Yes I do need to make those kind of buds but before those I need to make the ones above it on the plant.

These are easier and yes you can cheat a little.

Wrap floral tape around the end of your wire and shape as shown.
Push the end onto a flat surface then paint with the flower color. Blush the flower with green pastels then dip the flat end into white pastels. Then add the leaves as shown in a previous post but make them smaller so they don’t come all the way to the bottom of the bud. Cut of the wire.
I don't have a photo of a finished one, sorry, but that should be pretty self explanatory.
Now glue them to the main stem under the top buds.
For these I found the best way to attach them was :
Paint a thin line of sobo glue on the stem of the main plant. Then using a toothpick, paint the wire with super glue. Now very carefully, push this onto the thin line of sobo. Be warned …this is not easy….everything is so tiny and you will likely glue them to your finger many times. It will come off easily as it is such a tiny smidgen of glue. However, be sure to clear up any glue. Sobo and zap a gap gets really, really tacky and messy.
* * * * * * * *
Now to those other buds :-)
Now to those other buds :-)

As is often the case, the best way to make parts of a flower look realistic is to put them together exactly how they are in real life.
As I mentioned above, sometimes there are shortcuts, but in this instance I wasn’t able to find one that looked real enough.
As I mentioned above, sometimes there are shortcuts, but in this instance I wasn’t able to find one that looked real enough.
So here is how I did it:
As you did before, wrap some floral tape around the end of the wire. Shape it so it is bell shaped yet has a flat front end as shown. Dip in your flower color paint and set to dry.
Take a strip of the flower paper that is the same width as the diameter of the bud you just made and cut into this shape. Not even sure what shape to call it. I used a white water color pencil to draw around the top curve.

I tried paint but it wasn’t subtle enough, chalk was too subtle so a white pencil it was. An ordinary white pencil should do the trick as well….I just often use watercolor pencils so have those on hand.
Now you need to glue this round your bud. Do not glue the curved ends down yet. Once the main part is dry, take your tweezers and fold and glue the ends in. Glue the top and bottom down first then the sides and set aside to dry.
You will end up with something like this.

When it is finished, if the white looks too harsh then lightly dust it with some chalk in the same or similar color to your flower. Go slowly though….you don’t want to hide the white completely.
Then, as previously shown add some leaves around the base.
Then, as previously shown add some leaves around the base.

Now I have to say that, even for me, this step is really fiddly and a total pain in the bum. Maybe I'll come up with a different method at some point.
* * * * * * * *
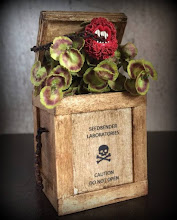
Now, don't all fall about laughing but here is the plant with these new buds attached.
As I mentioned earlier I am not entirely sure what is wrong with it but it doesn't look right. I think perhaps I need to start from the bottom up.
If anyone has any suggestions as to what it is wrong I would welcome them. But, I’ll continue with this one for the time being…it is only a practice one after all :-)

Here is how it should look.

Here is how it actually looks.


Jayne, the only things I can think of are that maybe the middle buds are a bit too large and the real plant seems much more full and the buds seems to fall more randomly. I think the way you did the actual flowers is brilliant. You have an amazing amount of patience!
ReplyDeleteI think it looks lovely and a heck of a lot better than I could create, first try or otherwise!
ReplyDeleteThe middle buds could be smaller and closer together, and I think you need more of the flowers themselves...you have probably already said that to yourself. But this little plant is fantastic.
I'm applauding, not laughing. :-)
Thanks :-)
ReplyDeleteI added more buds but it didn't work.
One of the problems is room. I have made each bud with a stem and then glued that little stem to the the main stem. This limits how many I can get in.
I always try to do them as they are in real life. As I said in an earlier post, the real buds have stems and aren't just stuck onto the main stem.
I think in this case I'll have to compromise and glue them straight to the stem.
To be honest, at the top you can't even see whether they have a tiny stem or are glued straight to the main stem so I think it'll be Ok...just not my preferred method of working.
I also agree that the sizes are very off. I think that is why I'll do better starting from the bottom.
As for the buds needing to fall more randomly...as they are now, with the little stem, every single bud is poseable so you can set them however you want.
But if I omit this small stem you'll lose that ability :-(
So, with the little stems on, you can bend the flowers down so they drape more as they do in the pic of the real ones? Seems to me that is the main difference in the two.
ReplyDeleteI absolutely love the way the flowers have turned out.
Patti
ooohhh.... I'm a total beginner and I don't want to start making flowers but I find everything amazing! may be more flowers are needed and they should fall more sofly but it seems an ersy to me to say anything.
ReplyDeleteDefinitely easier said than done Rosanna :-)
ReplyDeleteYes Patti...as they are you can bend the stems anyway you want.
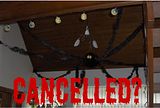
But.... wasn't happy so trashed them and started again.
Ooo, they did look good to me!
ReplyDelete* marlies