
..........what a pain in the derriere posting that tutorial was.
Maybe I am doing something wrong here but how it appears in the post entry field and the preview section are nothing like how it appears once published.
And what's up with this....every time you insert a new photo it appears at the top of the post entry field instead of where your cursor is. Such a nuisance having to drag each one down to the bottom all the while.
I apologize to anyone who might have been trying to view it and kept seeing it change or disappear. I had to keep publishing it, check how it was laid out and then going back and editing it until it looked right.
Oh well...it is posted now but I dare say I shan't be doing posts with multiple photos like that often.

Friday, 27 February 2009
Quick & easy bookshelves from skinny sticks
All you need is some card, skinny sticks, wood glue and odds and ends of wood for trimming.
As you read these instructions please bear in mind that my finished piece is meant to be old and worn so wherever you see splits or gaps I have left them that way intentionally….honest :-)
I start with a card base simply because it is easier than trying to glue skinny sticks together along the long thin edge. This also gives it more stability.
 Cut your card one skinny stick thickness under the height you want your shelves to be and the width of the back and 2 sides.
Here I am just using a piece from a shipping box but any sturdy card will do.

I cut all my skinny sticks in one go.
Taping them together with masking tape makes it much easier to do them in batches

Using regular wood glue, start gluing the sticks to the card.
This will be the inside back of the shelves.
Then you need to start gluing the sticks to the inside sides. You will need to leave a gap so that the sides bend in at 90 degrees.
This is easy to do, just fold the sides up so they are 90 degrees to the back and push the sticks as far into the corner as they will go. It doesn’t matter that they fall back outwards while the glue is drying.

You can see that my sides are too deep. I hadn’t decided how deep I wanted it at this stage and it is no problem to leave them and cut them card off afterwards.
While this was drying I made 2 shelves.

Again I glued the sticks to some card simply because it makes it easier and then trimmed the excess card away.
The card will be on the underneath of the shelf so won’t be seen.
Now you need to go around the outside of the card and glue skinny sticks on there. Try and match them up to those on the inside. I finished the front edges off with another stick.

You can see I also added some sticks on the inside bottom edge. This will be the support for the bottom shelf.

Glue in the top and bottom shelves
 Add a stick to the outside bottom front of the shelves and the same to the outside bottom back and sides.
 I added some very thin trim on the inside edges of the shelves to add some detail…....and cover up some small gaps that I didn’t want
The top is very simply made by gluing
sticks across it.
To finish it off I added some trim around the top and front of the shelves.
This was done with skinny sticks, scraps of wood and cocktail sticks.


And there you have it. A very simple, inexpensive and easy to make set of shelves.
Because I wanted mine to have the appearance of a well used, worn piece of furniture I went on and beat it up somewhat before aging it.

You can use the same technique to make any shape or size of shelves.
Here's another one I made earlier.

If you go ahead and try this have fun.
If you get stuck feel free to ask me any questions.
You can click on the photos to see enlarged versions.
Thursday, 26 February 2009
Tea
Being a Brit, I was asked by Tiffany of MiniMischief “What would a proper British lady consider "real" tea?”
Given that so many Americans I have met are fascinated with all things British I thought I’d post it my reply here.
Firstly I have to tell you all I am certainly not what one would consider a ‘proper lady’ :-)
Tea, the drink, is the solution to all the problems of the world…at least that is how we Brits see it. No matter what the crisis, a good cuppa will solve it.
As Bernard-Paul Heroux said “There is no trouble so great or grave that cannot be much diminished by a nice cup of tea.”
Tea is the solution to everything as Gladstone so very well stated:
“If you are cold, tea will warm you. If you are too heated, it will cool you. If you are depressed, it will cheer you. If you are excited, it will calm you.”
Then there is what we call ‘Afternoon tea.’ It is often claimed that this tradition started with the Duchess of Bedford in 1840.
Back then dinner wasn’t served until somewhere around 8 and 9pm. This would mean there was a long period between lunch and dinner and, becoming hungry by late afternoon, the Duchess asked for tea, bread and butter and cake.
This caught on and so the tradition of afternoon tea was born….so the story goes.
It soon became very much a very social event, particularly for the women of this period. The ladies would dress up in their finest clothes, of long dresses, gloves and a hat and have tea together.
And then we have the ‘invention’ of the sandwich by the Earl of Sandwich. It is said that he was a heavy gambler and at one of these gambling sessions he did not want to leave the table so asked that he be bought some meat between 2 slices of bread…something he could eat without getting his fingers all messed up and ruining his cards….and so the sandwich was born.
Prior to the Earl’s ‘discovery’, there were sandwiches. They just weren’t called that.
A traditional afternoon tea would consist of the following items.
A selection of dainty sandwiches. Including, of course, the obligatory thinly sliced cucumber sandwiches, with the crusts cut off. Also very popular is egg and cress, ham and smoked salmon.
Preferably these will be cut into 4 triangles. I know it all goes down the same way but sandwiches are they definitely more visually appealing when cut into triangles.
Cakes, tarts and/or pastries are also served. These should ideally be displayed on a tiered china cake stand. Popular cakes are Victoria sponge and Battenberg.
Scones served with clotted cream and jam (jelly to the Americans)
And of course tea. This must be loose tea not tea bags. Made the traditional way in teapot (warmed first with boiling water) it is then poured into bone china cups that sit on matching saucers and drunk while very hot.
Some real tea connoisseurs (including my Grandmother) will even sit their tea cups in boiling water first as well, thus ensuring a perfectly scalding hot cup of tea.
When I was a child we would have Sunday afternoon tea at my Grandparents House.
Brits also have a tradition also for Sunday Lunch. This is very similar to an American Christmas or Thanksgiving dinner…except we do it once a week :-)
After eating such a big meal at lunchtime, a light afternoon tea was perfect to nibble on.
Our tea would be very similar to the traditional tea I have written about. We all had our own part in the preparation of it. I remember vividly that mine was to take canned pilchards and remove the bones then mix them with vinegar. A job I don’t think I could do nowadays.
In the winter we also added crumpets. A delight you rarely see in the USA. We’d toast and butter them and then they’d be placed in a dish in the oven to be kept warm. Of course all that butter melted and the ones in the bottom of the dish were the ones we fought over.
With the busy lives we all now lead, the tradition of afternoon tea has sadly died out. You will still find tea houses throughout the UK but mainly they appear to cater for the tourists.
There are also many English bars and tea houses throughout the USA. So far I have yet to come across one that is truly authentic. So many of these places seem to think that so long as you hang a few portraits of the Queen and fly a Union Jack you are good to go.
I would really love to own a little English themed pub and bed and breakfast and one day. Whether that will ever happen I have no idea…but it if certainly fun to think of the all ways in which I would do it. One thing I am sure of is that it would be truly authentic.
And on that note I am off to put the kettle on !
Tuesday, 24 February 2009
Well I have no idea what is going on but I just can't seem to get that tutorial to post.
I am unable to leave comments on anyone's blogs either right now. I get to the word verification part and it just says "loading..."....and yes I did try typing that in to make sure that wasn't the word :-) I guess there is some sort of glitch so I'll keep trying.
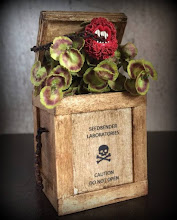
In the meantime, I thought I'd add a photo of the birdhouses I made for Roses Florist. The tallest is about 1" and the smallest are under half inch tall.
I know it is a florist shop but with the economy as bad as it is she had to diversify a little :-)
After a few attempts at some kind of stand that looked 'right' I gave up. Then hubby then said "why not hang them from the ceiling?"
Duh...why didn't I think of that...and he was right....it does looks very effective.
Whats going on !!!!!!
Firstly, a big thank you to all who have commented on my posts so far and to those of you who have decided to follow this blog.
I am trying to post a tutorial, however, for some reason unknown to me blogger appears to have had a life of it's own these last 2 days.
Whatever I post in the tutorial is not coming out right. It thinks it knows what I want more than I do and keeps changing the font type and size at random.
This makes the post hard to read and, being as picky as I am, I am determined to make it work properly.
So there will be a tutorial, as soon as I can get this thing to realize that it is a machine and I, as the human, know better.
Monday, 16 February 2009
My Favorite Piece
Do you have one?
That one piece you made that you fell in love with. Then you sold or gave it away and have regretted it ever since.
Mine is this cherry blossom bonsai.

It is so tiny it took me forever to attach all the blooms. The larger ones are shaped from 1/8th inch circle of paper and the smaller ones shaped from 1/16th inch circle of paper.
I drove myself demented trying to paint the centers of them and then give them that ruffled shape. Veining the leaves was no easy task either !

I can’t tell you how many of them ended up lost in the pile of my carpet. They were so small that the slightest sigh of exasperation from me would send dozens of them flying. I have to remember to hold my breath when working this tiny.
I am still disappointed I never figured out how to get stamen in them. I try to put stamen in all the flowers I make for that added touch of realism but just couldn’t find anything small enough to do so in this piece.
Still, this piece went to a lovely lady who loved it possibly even more than I did. Doesn’t feel so bad when you know it is in a good home.
Sunday, 15 February 2009
So when did it all begin?
As a child I grew up in a house that always had a dollhouse.
My Grandfather was a master woodworker who built toys for my Mother and her siblings and then for his grandchildren.
We not only had dollhouses but we had forts, castles, car garages and the like.
My Grandmother would help me make furniture out of whatever was available. I remember making little chests of drawers from matchboxes and using brass pins for handles. We even made a pram with working wheels from card.
We made dolls from the old fashioned clothes pegs and dressed them in scraps. She even taught me how to knit small garments using fine wool and cocktail sticks as knitting needles.
My Moms dollhouse was huge and extremely detailed. It sat in the spare bedroom at my grandparent’s house and, although I wasn’t allowed to play with that until I was old enough to not break it, I was allowed to look at it and spent many a Saturday afternoon doing just that. All of the windows opened and had tiny latches, there was a secret cupboard under the stairs and it even had a rooftop garden.
It is packed away in her attic back in England but one day I’ll get it out and restore it.
My other grandfather was more mechanically minded and built us all kinds of gadgets including tiny music boxes that I used in my dollhouse.
My other Grandmother taught us to make miniature gardens. We’d take a tray, fill it with soil and plant tiny plants in it.
We would often visit the model village at Bourton on the Water which was a scale replica of the village itself and still stands today. It was one of my favorite places to see as a child and I can remember when those buildings were bigger than I was.

Then one day I was taken to see Titania’s Palace, an 18 room dollhouse hand-built by Sir Neville Wilkinson over a period of 15 years.
I was totally captivated & 30 plus years later I can still vividly remember many of the tiny details.
I have since seen many, many dollhouses but none came even close to this masterpiece.
It is now on display at Legoland in Denmark but hopefully one day I’ll get a chance to visit it again.
This is a short video clip that shows you around the house. It isn’t in English but there are subtitles, and even without narration it is well worth watching.
And so here began my lifelong passion for all things tiny.
Friday, 13 February 2009
So here I am....with a blog.
For those of you who have been telling me to get one for ages, yes I finally caved in :-)
Not for the usual reasons though. It is unlikely, at least in the near future, that this blog will be updated on a regular basis.
However, there are so many excellent blogs out there belonging to other miniaturists, that this seemed the easiest way for me to keep track of them all.
I have tendinitis in one of my fingers right now which is making it near impossible to make miniature flowers. I had no idea that the middle finger on my left hand was so useful.....until I was unable to use it.
I have managed to almost finish building my first dollhouse though. Much easier to do one handed than tiny flowers. It should be completed in a week or so and I'll post photos then.
Jayne
Subscribe to:
Posts (Atom)