Monday 30 March 2009

It stated with a kiss....


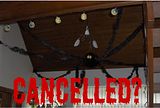
Actually, it started with a bonsai is more appropriate...but that sounded silly :-)

While waiting for some glue to dry, I started doing some research online and figured I'd twist some wire for a bonsai while I was reading.

Ha ha....totally got carried away and now I have the top part of a tree....and I don't know what to do with it.


It stands about 4" tall as it is. There is no trunk, this was supposed to be a bonsai remember. Hopefully I might be able to graft some kind of trunk onto it.

Too small for a whomping willow I thought about Treebeard the Ent but he wasn't as leafy as this up top....but...then again, that was just Peter Jacksons interpretation....does anyone know what an ent really looks like.

Or a Japanese red maple tree....or a large cherry blossom tree...hmmm...what do you think ?

Strike while the iron is hot.....


....or not as the case may be.


It appears I have been give this award numerous times….thanks so much all of you who consider me worthy of it.

Now, the dilemma. It also appears most other people been given it as well These things breed faster than a wild rabbit on spring break.

I knew should have done it as soon as I got it….last at the party again.

After all it wasn’t like I had anything better to do….oh wait….what did I do instead…lets review my weekend….

I spent the weekend, listening to Mick cussing Microsoft whilst trying to make my computer faster than Speedy Gonzales. Which he did by the way…he is handy to have around at times.

I went into every supermarket in a 30 mile radius looking for an elusive leg of lamb to make some curry. Why don’t Americans eat lamb? We did find it in Costco and at that point was prepared to pay the $50 fee to join…till we saw the lines.

Ended up making a beef curry which I really didn’t care for.

Knocked over a tub containing approx 2000 maple leaves…..into my glue pallet which had zap a gap on it.

I was approached by a new neighbor (who, BTW, looks like Joaquin Cortez). Apparently he had noticed me out and about a lot. He asked me if I ran every day. Run ? What is this running of which you speak…? I walk...a lot...I also stop...a lot ...to watch the birds or look at the flowers...but run ? Not me ! I am sure he was thinking to himself. “Hey I see this chick out here 5 times a day with her fanny pack (oh I can’t bear that term for it…it’s a bum bag OK !) and bottle of water…how come she is still such a porker” LOL.

And I did laundry…goodness my life is so exciting at times.

So, back to this award…sorry I left it so late peeps but you are ALL worthy of it. I have made so many new friends on here that are deserving of it.

And now back to the foxgloves…they are coming along nicely.

I have to say they are actually pretty easy to make….don’t fall over laughing…I mean it.

Sure they are fiddly but anyone who make miniatures is used to that…and if you’ve ever done smaller than 12th scale they’ll be a doddle.

The only downside is the time they take time…and lots of it. These aren’t like some flowers you can just throw together quickly, each one has lots of small parts and there is a lot of waiting on glue to dry….but other than that…easy peasy lemon squeezy !

And while I am waiting I can cut more Japanese red maple leaves :-)


Saturday 28 March 2009

Award Time.

Woken up at the crack of dawn by our gardener, I was not in the best of moods this morning.....then I found that I had been given an award from Jodi at http://creagerstudios.blogspot.com


Thank you Jodi for considering me worthy of this award :-)

Here is the description of this Award...

"This blog invests and believes in the PROXIMITY-nearness in space, time and relationships. These blogs are exceedingly charming. These kind bloggers aim to find and be friends. They are not interested in prizes or self-aggrandizement! Our hope is that when the ribbons of these prizes are cut, even more friendships are propagated. Please give more attention to these writers!”

Wow....pretty impressive huh !

And it is a new one so I can have fun passing it around to another 8 people.

Weekends are a bit manic here and, this weekend Mick is taking my computer apart to give it some more steam power, so I'll do it on Monday...will give me time to think about it.


Friday 27 March 2009

Just in case....

....any of you thought I'd forgotten the foxgloves here is an update photo.


It is quite 'normal' for my fingers to be working on one thing and my mind on many others. So just because I am asking about whomping willows doesn't mean that these have been abandoned.

As you can see they are in various stages of completion with only the practice one on the far left completed.

The things on the far right are fresh buds drying...they are sitting on the points of cocktail sticks.

Some of the buds on the center flowers look at an odd angle and aren't hanging enough. This is only while the glue is drying. They are all wired so are poseable but I shan't attempt to bend them down until they are dry.

Getting there...slowly but surely :-)

Whomping Willow


I have questions.....I can't find many clear pictures.

How tall would one be ?

What kind of a willow is it...doesn't appear to be a weeping willow and I can't figure out the leaves.

Is there some kind of hole in the trunk to the secret room...or whatever it is down there.....I am not up on Harry Potter and it was years ago I read some of the books.

Is it spinning ?

Don't worry Nikki...I'm still working on your foxgloves :-)


Thursday 26 March 2009

They're Coming to Take Me Away Ha-Haaa


So, is this it ? The whomping willow. This is the pic I keep looking at and wondering....could I... could I really ? Would I want to even ? What am I thinking" La la la....crazy thoughts begone.

Someone asked me about this a looong time ago as well...I think I offended them with my rolling around the floor and laughing. I think the comment I got back was something like "but it's only a tree...just twist it up a bit"

I know I am pretty ambitious but seriously, I think this might even push me over the edge of sanity.

Has any miniaturist made one...I need to go watch the Rik Pearce videos...bet he has one.

Paperclay pics for kate


I happened to take photos as I was making this small piece of wall...they aren't great as I wasn't doing them for a tutorial or anything.

It was also one of my earliest attempts with paperclay but you should be able to get the idea of the technique I use I don't do anything different now...have just got better at it.

Ignore the card I used as a base, that would be your floor...I was just making a small wall to fit into a shadow box

One other thing...keep the parts of paperclay you aren't working on covered with a damp cloth to stop it from drying out.

Hope this helps :-)

.


Really...why bother...


....cleaning up that is. Five minute after you do it the place just gets messy again.


I need more space to work...things are starting to fall off my bench....although I daren't let Mick hear me say that given that I take over his bench already :-)

This is after a day experimenting with foxglove leaves. Think I'll leave this for a while and go make more buds....I can't get them right but something will come to me when I am not thinking about it.

In the meantime these are 3 photos I have as inspiration for my next project..

A weeping willow tree.....although I think I must be crazy to even think about that one. Another cherry blossom bonsai...isn't this just stunning.
The third is a Japanese flowering quince...so pretty...the quince has been on my wall for some time, just haven't got round to it yet.

Tuesday 24 March 2009

Harry Potter


All this chatter about Harry Potter and co has got me thinking.

Are there any plants or flowers in there ?

It might be fun to have a go at something strange :-)

So HP fans......any ideas ?

Finally....a foxglove !


Sorry these aren't great photos but my camera is really acting up. For some reason my camera won't focus properly on super macro right now and I can't get in to get a decent close up.

Hopefully, you can still you get the idea from these.

Each of the flowers have the tiny white and purple dots in them, there are a couple of shriveled flowers, a couple of leaf stems where the flowers have fell off and it looks like a caterpillar has been at some of the leaves :-)


This is the prototype though...don't worry Nikki, you won't be getting this one....the rest will be much better :-)


I will continue the tutorial once I can sort my camera out but really the only steps left are the flowers and the leaves. So, if you want to carry on, here is how I did it....without photos

The flowers were made by cutting a piece of paper about 1/4 inch square. Dot with white paint down the diagonal center, leave to dry then dot with purple paint over the top.

Wrap around the end of a toothpick until you form a cone shape and glue the edges down. Make sure the edge you stick down is at the back of the flower....otherwise you'll end up with a reject like above.

Cut the flower down to size. The 1/4 inch paper will give you a flower that is too big but it is much easier to handle at that stage. Insert a small piece of wire through the flower. This will become the stem which you connect to the main stem.

Once it has dried, paint the opening edge of the flower with white. I ended up using water color paint...acrylic was not subtle enough for this. Then using a tooth pick or stylus bash the opening (gently) so to it starts to curl back.

Attach 4 tiny leaves to the base of the flower but only glue at the very bottom then curl them out. Then bend the flower over and glue the wire part to the main stem. This will give them the effect of the flowers hanging rather than just being stuck to the main stem but you probably can't see the effect in these photos.

The main leaves I just cut by hand from scratch. I am not happy with the color of them yet so I'll leave that till I have figured it out better.

Now I need to go do all this again.... 8 times :-)


Nearly there :-)


I've been working like crazy to get this practice foxglove finished. Decided I couldn't do the production line thing after all....I was getting far too bored with them and boredom means unmotivated at best and at worst sloppy......so I made just one.

My camera is acting up and I can't get a decent pic tonight though as it is getting too dark. If I use my regular photo lights you can't see the bitty dots in the flowers so I'll wait until tomorrow to post pics.

Stay tuned :-)

Saturday 21 March 2009

More Awards


Goodness me....these awards are all over the show.

Thank you Sam for awarding me the Sisterhood award.

I do believe that as I have already had it and passed it on I don't have to do it again but thanks very much for giving it to me.

No foxgloves today...I am still recovering from the grocery shopping ordeal this morning....honestly...all that trauma and it costs you so much to do it..crazy...I wish I could just have food pills.

Then I spilled coffee all over the place...not my fault this time...the lid on the Folgers can didn't fit....so the floor got another mopping...I think we'll maybe eat dinner off it tonight.

And now I have to cook said dinner...another of those housewifey things I find a chore. I tend to cook in bulk, get it all over with and freeze it. Pot pies and sausage rolls tonight...I do the filling, Mick does that yukky pasty stuff.

So Mick has tootled off to get a new tire for his motorbike and left me cooking.

Dang that bike costs him more to maintain than me....but isn't that often the case with the 'other woman' :-)


Friday 20 March 2009

Award time


Rosanna has very kindly given me this award

The rules for this one are.I have to to list seven things I love, then pass it on to another seven Kreativ Bloggers.

Hmmm....only 7 things I love...aside from my hubby (have to say that 'cause we only recently got married), my Son and the rest of my family.

1. Surprises from Mick...he isn't a chocolate and flowers man, which is fine by me because I get things like Micro drills and lava rock of Mount Fuji.

2. Yes rocks..love them and pick them up from each state I visit. Our trunk is always full of rocks after a road trip. Oh no...that just made me realize how am I going to do this now we go everywhere on the bike...I'll have to limit it to a pebble from each state :-(


3. My sense of smell.....Mick doesn't have one so it really makes me appreciate mine Sometimes I feel sad for him but we do get to eat lots of spicy food...he can't taste much else.

4. Music...especially live bands. no matter how well known or not and pretty much any kind except rap.

5. English pubs...one of the things I miss most about 'home' Especially the small ones with a folk singer and his guitar up the corner

6. Reading...pretty much anything except those ripping bodice, thundering loin type of novels.

7. History...I love to read about history and different cultures... native American and African are favorites but more recently getting very interested in Mexico and it's history.


And now to pass this on....

De from Delightful Minis - for being the most productive and varied miniaturist I've ever come across....you go girl !

Minikat - because she wants to buy me beer and chocolate

Grace at Treefeathers - because we both have long hair, live in the desert and get hair round our toes.

Sans - because she appears to be the only one brave enough to attempt to make Foxgloves.

Rute - amazing for a 15 year old. Go check out her blog.

Lotjes - a fellow flower maker.

Don't ever, ever.........


........Put regular hand washing dish soap into the dishwasher.

Yes you can see where I am going here. The inside door of the dishwasher was grubby....how that can be is another story...anyhow so I squirted it with Dawn and started to clean. Duh, I thought, why not just put the dishwasher on rinse....that'll clean it while I go clean somehting else.

So I did and proceeded to go clean the bathrooms. Then came into the workroom.

Half hour later I decided I was hungry...it was 3pm ish and I hadn't eaten anything yet so I tootle off into the kitchen to make some breakfast / lunch.

Oh my....did you ever see that Doris Day movie where she dropped soap suds into the swimming pool...well the kitchen looked just like that.

So I had to mop the floor....again.

The dishwasher appears to be pretty clean now....of course I still can't see the bottom of it as it is covered in suds lol.


Stuck in a corner


Well, I've mopped myself into a corner, literally. Luckily it just so happens that is it where the computer is so I can take a break. Don't want to be getting footprints on my clean, but wet, floor now do I :-)

But really, what is the point of cleaning when you live in the desert. I dust and within 5 minutes everything is covered again.

It is hot so I am in and out all day. I feed the birds lots so am forever dragging in sunflower seed shells or bits of seed.

Add to that I have really thick long hair and shed like the worst dog ever and you'll see why I hate cleaning. My hair is blond which makes it worse....you can't see it to get at it until it starts forming hair balls under the dining table.

I don't have a pet but I did buy a pet vac.......for my own hair :-)

And the house we live in, not only is it full of nooks and crannies the vac won't reach into without pulling out one of the attachments, one wall of the living room is almost all mirror...can I say 1970's. Which is rather strange seeing as how the house wasn't built till the late 80's. I hate it with a passion.....not just for it's ugliness but it is so hard to keep clean. I have considered embracing it and doing the living room to match...glittery disco ball and all :-)

Seriously, it is enough to make me consider going out to work just so I can justify paying a cleaner to come in and do it.

Oh well, back to the slog I guess. May as well carry on while I'm on a roll...I am cleaning like I am about to give birth or have visitors over.

Friday already ?


I can't believe we are at the end of another week already....I am getting old....time is going past far too quickly for my liking. Having Mick home for 2 days totally confused my sense of time.

Anyhow, I am going to try and step away from the foxgloves today. I have reached a point where I am getting irritated with them and that isn't very conducive to creativity.

I know that the answer will come to me right when I stop thinking about it...so I am going to stick on some music, clean the house and ignore them for a day :-)

I also appear to have lost one of them this morning but it should be easy to find...it is about 4 inches long so it can't hide as well as the little bits do.

Thursday 19 March 2009

STOP !


If, by any chance you are attempting to make foxgloves with this my instructions, completely ignore my last posting.

It isn't working and they look like crap.

I am struggling with the buds that are partially open. I don't like working with florist tape at the best of times but, it seemed to work. Now I am wondering about it's longevity so it is probably best not to use it at all.


The problem I am having is, I guess, related to scale. I can get them to look perfect but the buds are too big. If I make them smaller then the detail I put into them is totally lost.

I hate it when that happens, you want detail but on things this tiny sometimes you just have to create the illusion rather than making it just like the real thing :-(


So I am now stuck as to how to proceed. I will figure it out but it may take a little while.

Nikki, sorry they are taking so long but honestly, they look real bad and I won't send out anything like that.


Back to the drawing board....or should that be back to the paper and toothpicks.

Buds, buds, and more buds


Nothing new to show you all today. I have a little production line going on here. Those shown in the photo are 12 foxgloves with the top layers of buds on and fresh buds drying.

I don't really like working like this but it does make it much quicker in the long run. If I assemble the parts all in one go I then I have them all ready to put together. Pretty boring not having anything new to share though.


I also need to cut out more leaves....yuk. That is something I don't do all in one go....it does my eyes in far too much to attempt that. For 175 buds, with each bud having 3 or 4 leaves, that makes somewhere in the region of 600 leaves to cut out.

Mick is working from home yesterday and today, for the simple reason he has lots of work to do and gets too many interruptions at work. So, in the interest of making sure I am not a distraction to him either, I have decided not to vacuum, dust, do laundry etc and am quietly making foxgloves instead :-)


Wednesday 18 March 2009

Foxgloves continued.

So here are revised instructions for the next 2 layers of buds.

I wasn't happy with the way they were turning out previously so you'll see I changed the way I have done them slightly.

Ignore the fact that this starts at step 9, I will eventually put this all into one document with complete instructions so have now started numbering the steps.


I am actually still not happy with step 11 so will likely change that again :-)


* * * * * * * * *


9. Following down from the very top buds, you'll see that the actual flower part of these are more visible than the first you did.

Take some floral tape and cut it onto strips approx 1/8th inch wide.

Wrap around the end of a toothpick until you have a bud shape.


10. Once it is wrapped, push the end against a hard surface to flatten the end.


11. Paint with the same pale green color you used earlier and add blush with chalk. Dip the flat end in white chalk. As with the previous buds, add the leaves around the base but don’t bring them right to the tip of the bud.


12. The next level of buds are starting to open.

Take another strip of 1/8th inch floral tape and wrap once or twice around your wire.

Then, and now comes the tricky bit, place the end of a toothpick just onto the floral tape.


13. Continue wrapping the tape going up onto the toothpick.


14. Gently slide off the toothpick and you will see you have a round opening at the end.


15. I wanted to square this opening off a little so I used a cuticle stick that I have sanded down. Just push it in and wiggle it around a little.


16. Paint this bud in the same color paint you will use for the flowers, but add some white to make it a shade lighter. Then take a smear of white paint on a non absorbent surface and gently dip the end of this bud in. You will be left with a tiny ring of white around the opening.


17. Take a ball nose stylus and gently push the sides in…do the top and bottom first then the two sides.


And this concludes today's lesson :-)

I now have to go make a whole bunch of these on top of the other buds......I may be some time before we can move onto the flowers.


Tuesday 17 March 2009

Foxgloves


I apologize for the lack of updates on making these foxgloves but I am still making the tiny buds.


I have about 150 to make...no make that 175...I am sure I'll lose at least 25 in the carpet.

However, I have redone the next step and will post new photos in the morning.


Lighting


After posting the photo of the lit staff we made I've been asked a bunch of questions regarding lighting things up.

Let me just say, Mick did all the lighting stuff...I did the easy part and made the staff.

Mick is an electronics engineer who makes life support equiptment (ventilators) so lighting a staff, or any miniature, is simple to him. He speaks in the tongues of strange languages such as biology, physics and chemistry...all completely over my head.


He is working like a madman at the moment on a new ventilator they are about to launch but, once he has figured out all the problems and it has all quietened down, I'll ask him if he will do a quick tutorial.

In the meantime, maybe you can figure it out from this photograph.


Awards !

Well there appears to be a slew of awards floating around this weekend and so many of them have ended up at my feet.

Thank you, thank you very much (in my best Elvis voice)

Now, I don't believe there are enough people left to pass it on to so ....for all of you who make me laugh with your blogs and comments....here's a little video that cracks me up.

I give you the Penguin Slap.......


Happy St Patricks Day !


I might be a complete hybrid of races but I don't even have a teeny bit of Irish in me. Still any excuse for a Guinness I say, so Happy St Pats everyone:-)


I have to nip out and do some boring chores but I'll be back shortly and promise to catch up on all that's happening later.

Monday 16 March 2009

Sorry peeps...my internet connection is slower than a moldy sloth on it's way to get a good hiding today.

I've published all the comments but I'll try and respond tomorrow...as it is, I keep getting timed out. :-(

Monday already ?

Well, in keeping with the meaning of my name that Brenda posted here on Friday.... we did what every irresponsible person does when there is lot of work to be done….we bailed.

Saturday morning we got up and decided we needed a mini vacation. We rarely have a plan other than we’ll head North, South, East or West. We just follow our noses and see where we land.

So, we headed over the mountains, through the Los Padres National forest and ended up in Santa Barbara. On Sunday we drove back down the coast on the Pacific Coast Highway through Ventura, Malibu & Santa Monica. It was my first time in Santa Barbara...wow...if ever I become a multi millionaire I shall move there. The Mission was spectacular....unfortunately, being a Sunday, we were unable to go in as there was a mass in progress but I will definately be going back one day.

So, no foxglove update today but I’ll leave you with some photos of our little trip.


I am not gong to be like your crazy old aunt and make you sit through a slide show of holiday photos but, if anyone is interested in seeing more photos of this beautiful state, and the rest of the country, you can see them here.

Now I need to go check all these emails :-)

Friday 13 March 2009

TGIF


Today I really need to crack on and get some tops of foxgloves made. I don't want to start on the flowers while I am on a roll with the little buds so you'll have to bear with me.

in the meantime, for all you witchy and wizard people, I'll leave you with this photograph of a 12th scale wizard. He was made by Viola Williams and she wanted a staff for him. She was after something that looked like a tree branch that lit up.

Through the wonders of the internet and dollhouse groups, it ended up on our doorstep.

I made the staff and the mad scientist made it light up. It is a shame you can't see it in the photo but if flickers just like a real flame.


It was a different and fun project to do and as it turns out, Viola doesn't live too far from us so we got to meet her and her hubby which was lovely .....as was the lunch she made us :-)

Thursday 12 March 2009


For the nosey amongst us, and because I'll use any excuse not to mop, I thought I'd post some pics of the rest of my workroom.

This is my storage corner...although it is getting rapidly overtaken by computer paraphernalia. The monitor is ancient but Mick wants to set up a pc in the garage as a test machine for something. The black box is a server from Circuit City, they went into liquidation and were selling off everything including their servers...and Mick just had to have one.


These little drawers are perfect for storing minis in. Oh look another computer tucked up a corner.


This is mad scientists HQ. I have no idea what half that equipment is other than, in the case of an earthquake, I need to save that rather than my stuff as it costs $1000's


And here is the work area Mick built me in the garage...pretty cool huh :-) I am supposed to do all my messy work out there and not on the dining room table.


Clean up day


Well today I need to take a break and do some cleaning. My desk is a tip and that really needs sorting out before I move on.

And so is the house, I really must run a mop around to get up the dozens of little leaves that are all over the place....seriously they get everywhere. There is even one in the bathtub. I have no idea how it got there as we have a glass shower enclosure and the doors are shut lol.


Just look at my desk....ugh ! Definitely, time to dig out the reject tub :-)


I also have a bunch of personal emails to answer, I got so focused on these foxgloves I've been neglecting everything else...bad Tallooley.

Wooo $@*$!*&#$%& Hoo


Well folks...I do believe this is it.....I am pretty happy with this one :-)

See I do get there in the end. If anyone has any criticism about these speak up now or forever hold your peace :-)


I think the next lot can wait until tomorrow.

Wednesday 11 March 2009

Starting again.


I know I said I'd go with that one till it was completed but it was just too bad and I couldn't....so more for the trash :-)

Now, you'll have to bear with me while I start again.

I've done the very top buds...these won't be poseable but this is the only way to get them so small.


I used exactly the same method of placing the leaves etc. Just be very careful if you give this a go...I cut my finger trimming one of the buds..nothing some zap a gap couldn't cure but be careful.

The leaves...well...they are now 1/32 of an inch.

Nikki...I hope you like the end result...at this point I do believe you'll be the only person ever to own some Tallulah Belle foxgloves. Shame I'll never be famous :-)


You'll have to trust me that they look much better in real life.....getting in so close makes them look awful :-(

Foxgloves continued

Lets try again.

Now I have to say at this point I hate how this plant is looking so far but figured I'd post it so you can all learn from my mistakes as well as learning any useful tips.

* * * * * * * *

Well I kinda jumped ahead of myself yesterday. Yes I do need to make those kind of buds but before those I need to make the ones above it on the plant.


These are easier and yes you can cheat a little.


Wrap floral tape around the
end of your wire and shape as shown.

Push the end onto a flat surface then paint with the flower color. Blush the flower with green pastels then dip the flat end into white pastels. Then add the leaves as shown in a previous post but make them smaller so they don’t come all the way to the bottom of the bud. Cut of the wire.

I don't have a photo of a finished one, sorry, but tha
t should be pretty self explanatory.

Now glue them to the main stem under the top buds.

For these I found the best way to attach them was :


Paint a thin line of sobo glue
on the stem of the main plant. Then using a toothpick, paint the wire with super glue. Now very carefully, push this onto the thin line of sobo. Be warned …this is not easy….everything is so tiny and you will likely glue them to your finger many times. It will come off easily as it is such a tiny smidgen of glue. However, be sure to clear up any glue. Sobo and zap a gap gets really, really tacky and messy.


* * * * * * * *

Now to those other buds :-)


As is often the case, the best way to make parts of a flower look realistic is to put them together exactly how they are in real life.

As I mentioned above, sometimes there are shortcuts, but in this instance I wasn’t able to find one that looked real enough.


So here is how I did it:


As you did before, wrap some floral tape around the end of the wire. Shape it so it is bell shaped yet has a flat front end as shown. Dip in your flower color paint and set to dry.

Take a strip of the flower paper that is the same width as the diameter of the bud you just made and cut into this shape. Not even sure what shape to call it. I used a white water color pencil to draw around the top curve.


I tried paint but it wasn’t subtle enough, chalk was too subtle so a white pencil it was. An ordinary white pencil should do the trick as well….I just often use watercolor pencils so have those on hand.

Now you need to glue this round your bud. Do not glue the curved ends down yet. Once the main part is dry, take your tweezers and fold and glue the ends in. Glue the top and bottom down first then the sides and set aside to dry.

You will end up with something like this.


When it is finished, if the white looks too harsh then lightly dust it with some chalk in the same or similar color to your flower. Go slowly though….you don’t want to hide the white completely.

Then, as previously shown add some leaves around the base.


Now I have to say that, even for me, this step is really fiddly and a total pain in the bum. Maybe I'll come up with a different method at some point.


* * * * * * * *


Now, don't all fall about laughing but here is the plant with these new buds attached.

As I mentioned earlier I am not entirely sure what is wrong with it but
it doesn't look right. I think perhaps I need to start from the bottom up.

If anyone has any suggestions as to what it is wrong I would welcome them. But, I’ll continue with this on
e for the time being…it is only a practice one after all :-)


Here is how it should look.


Here is how it actually looks.